The RELO IO8 handles both TCP and UDP on the same device. Because receive nodes and send nodes are completely independent, you can mix and match: take a message in on TCP and send it out on UDP, or the other way around. The whole bridge fits in three nodes and takes about two minutes to set up.
When this is useful
A lot of AV and control gear speaks one protocol but not the other. Older show controllers often send over serial-converted TCP, while DMX processors and media servers tend to expect UDP. Instead of replacing hardware or adding a separate conversion box, you can use the IO8 to sit in the middle and translate on the fly.
- A wall panel sends TCP strings to trigger scenes on a UDP-only media server
- A lighting console uses UDP for its network protocol, but your relay logic runs over TCP
- Two systems need to exchange messages but were built for different network stacks
How the nodes work
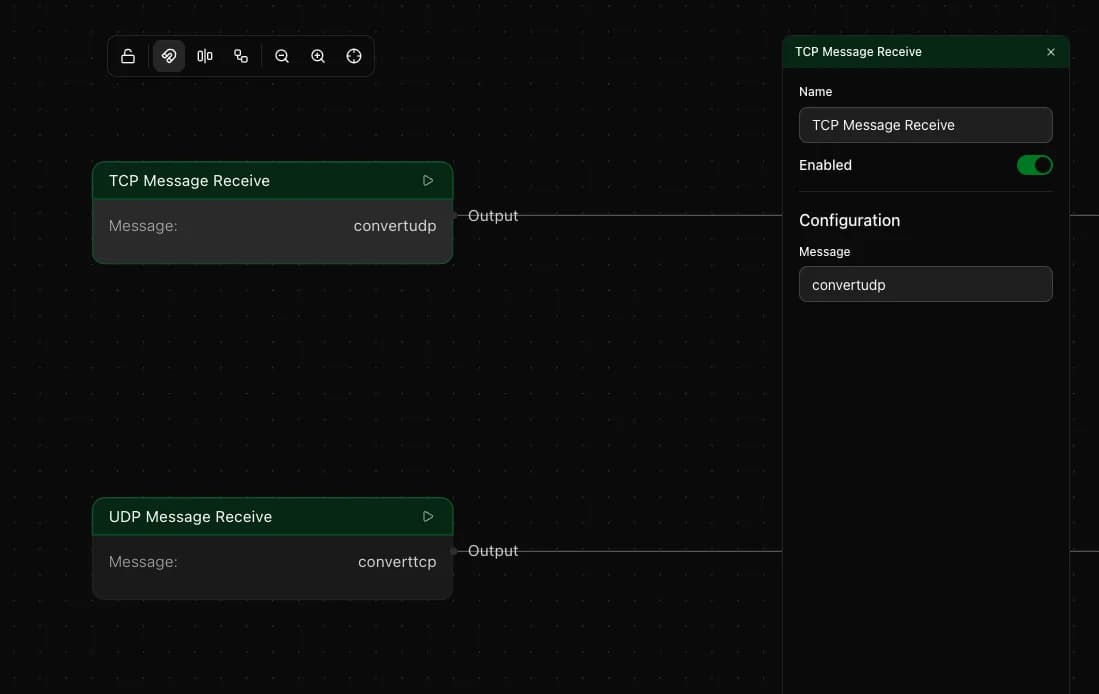
The flow editor has four nodes that handle raw network messages: TCP Message Receive, UDP Message Receive, TCP Message Send and UDP Message Send. The receive nodes are triggers: they fire when a message arrives that matches what you configured. The send nodes are actions: they transmit a message when execution reaches them.
Receive nodes
Each receive node listens on the device network interface for incoming messages. You set a message string to match against. When an incoming message matches, the node fires and the connected actions run. Leave the message field empty if you want the trigger to fire on any incoming message regardless of content.
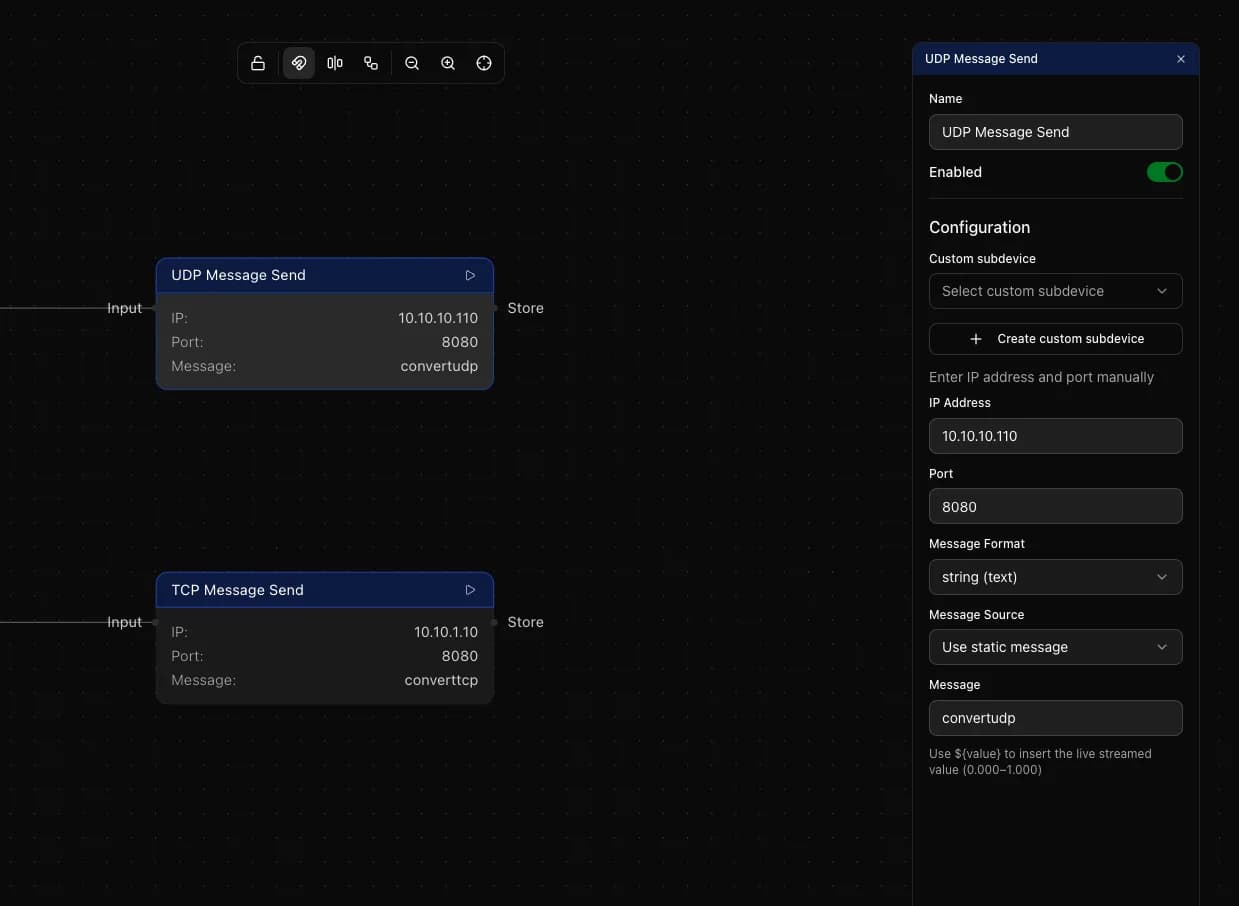
Send nodes
Send nodes target a specific IP address and port. You can enter these manually or pick from a saved custom device. The message field supports three formats: plain text string, space-separated hexadecimal bytes such as FF 01 03 or decimal bytes. Pick the format the receiving system expects.
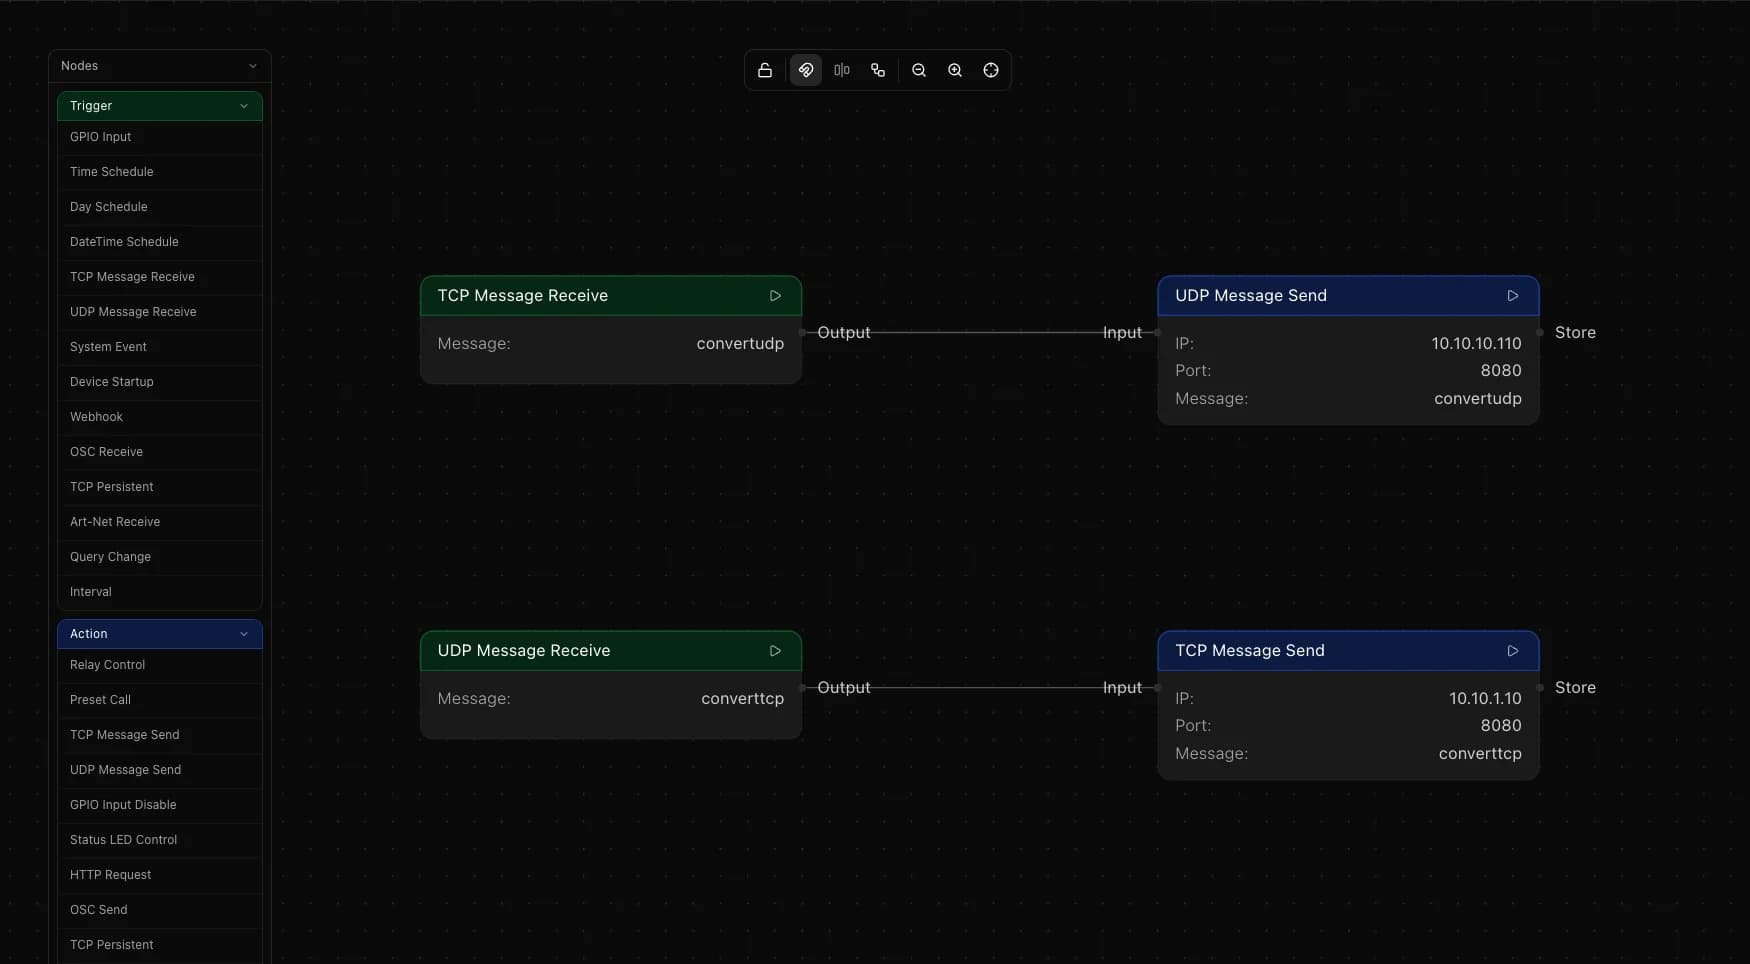
Building a UDP to TCP bridge
This is the most common setup: something on your network sends UDP and you need to forward it over TCP to a device that only accepts TCP connections.
Add a UDP Message Receive node as your trigger. Set the message field to the exact string you expect to receive, or leave it blank to forward everything that arrives.
Connect the trigger output to the execute input of a TCP Message Send node. Enter the IP address and port of the TCP device in the send node. Set the message to match what you are sending and choose the correct format. That is the complete bridge.
Building a TCP to UDP bridge
The reverse setup works exactly the same way with the node types swapped.
Add a TCP Message Receive node. Connect its trigger output to the execute input of a UDP Message Send node. Configure the send node with the UDP target IP address and port.
Sending a pre-set value
Both TCP and UDP send nodes have two message source modes. Static sends the same string every time. Stored pulls the current value from a Store Value node elsewhere in the flow, which is useful when other parts of your automation update that value based on conditions or events. Switch the mode in the send node configuration and select which Store Value node to read from.
One flow per message
The bridge sends a fixed message every time the trigger fires. If you need to send different messages depending on what arrives, build a separate flow for each case: one flow per expected input, each wired to a send node with its own message configured. This keeps the logic straightforward and easy to debug.
A practical example
Say you have a lighting console that sends a UDP string to port 6454, and a show controller that only accepts TCP on port 3000. Add a UDP Message Receive node set to match that string, connect it to a TCP Message Send node pointed at the show controller IP on port 3000, and configure the same string in the send node. Every time the console fires, the show controller receives it over TCP within milliseconds.
Things to keep in mind
- The device handles both incoming and outgoing connections simultaneously, so one IO8 can run multiple bridge flows at once
- TCP Message Send opens a connection, sends the message and closes it. If you need to keep a TCP connection open, use the TCP Persistent node instead, which maintains a persistent connection and supports multiple commands over it
- UDP is connectionless: the send node fires a packet with no handshake required
- Use the hex or decimal format when the target device expects binary data rather than a text string

